Tasty Links allows you to set links for special keywords that you define. Every time a keyword is used on your blog, it will be automatically linked to the keyword you set.
These links are generated on the fly when the page loads, so they don't actually exist in the post content. This means that the links can be changed at any time and those changes will propagate across your entire blog. ✨
In this article, we'll review all of the different features that Tasty Links has to offer to help you make the most of it on your own site!
Create a new Tasty Link
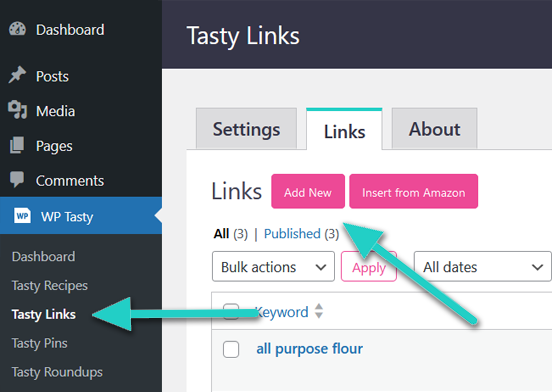
- In the left-hand navigation of your WordPress dashboard, go to WP Tasty → Tasty Links → Links page, then click Add New.
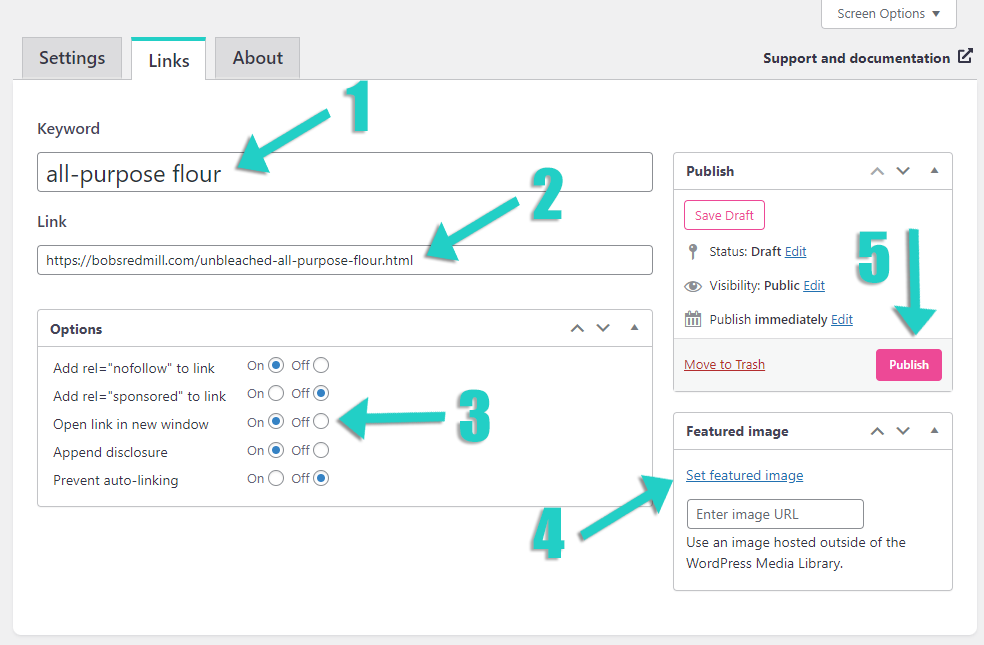
- In the “Keyword” field, enter the keyword that you want to be ✨automagically✨ linked when someone reads through your posts. The keywords must match the spelling and punctuation exactly, but they are not case-sensitive.
For example, the keyword “All-Purpose Flour” would match the terms “all-purpose flour and “All-purpose flour” but would not match the term “all purpose flour.”
- Next, in the link field, enter where you want the link to point to. This could be an affiliate link, a related page on your blog, or a resource that you refer to often.
- Add your featured image! This is 100% optional. The featured image is used in the Featured Links blocks and your Tasty Recipes Equipment section (more about these features in a bit).
Set Featured Image: Use this option when you add your product images to your Media Library.
Enter Image URL: If you're not adding your images into your Media Library but store them on an image hosting site, you'll paste that URL in this field.
*Amazon affiliate links can be pasted in the URL field, but it may be better to use the “Add Amazon Link” feature instead We'll discuss that in a bit.
- When you're done creating your keyword with all of the necessary attributes, click “Publish” and the links will start showing up across your blog. Nothing you need to do here! The links will appear retroactively on all your posts.
Special Note: Tasty Links will not override your previous manually-entered links. If you have links applied to your new keywords, those original links will take top priority and will not get updated by Tasty Links.
Link Options
In the Options section, you have several different attributes and ways to handle them. Let's discuss them below. ⬇️
- Add rel=”nofollow” to link: Select whether or not you want the link to be set to
nofollow. You'll want to add this attribute when you're using paid links.Additionally, Google recommends the following:
“Use the
nofollowvalue when other values don’t apply, and you’d rather Google not associate your site with, or crawl the linked page from, your site.”Regarding Google's recommendations, you can add the
nofollowattribute when you're writing about a brand that's not paying you since it is not associated with your site in any official manner. In the next point's section, the link provides a bit more information for you. - Add rel=”sponsored” to link: The
rel="sponsored"attribute lets Google know that this is a paid link. The most important thing to keep in mind is that if you're getting paid for the link in any capacity—be it an affiliate or sponsored link—you'll want to add therel="sponsored"attribute. Easy enough to remember!Keep in mind, though, when it comes to affiliate links, you'll want to add both the
rel="sponsored"andrel="nofollow"attributes. That way, Google recognizes that it's a paid link and that it shouldn't contribute to the target site's Page Rank.Learn more: Understanding Outbound Links: rel=nofollow, rel=sponsored, and UGC - Open link in a new window: Pretty self-explanatory here. If you want it to open in a new browser tab, select “On.” This option keeps your site on your readers' browsers while they check out those amazing resources you provided!
Linking to your own site's blog posts? Skip this option. Setting up affiliate links or outside resources that are helping strengthen your point of view? Use new windows.
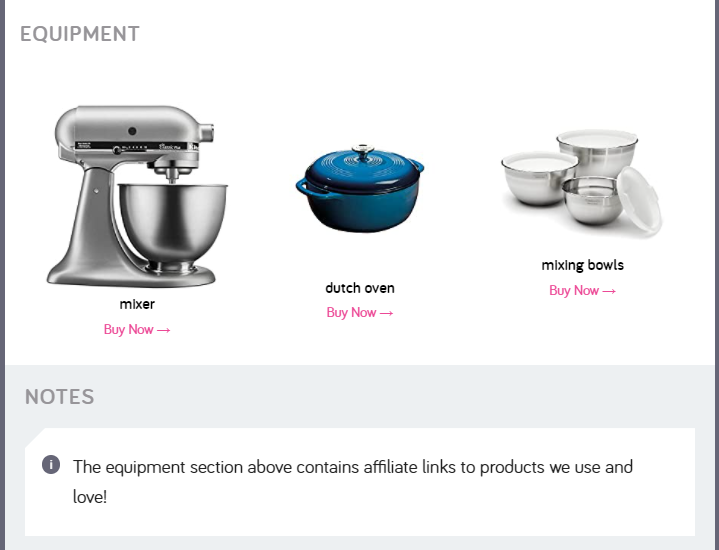
- Append disclosure: Turn this on for your affiliate links. In your Tasty Links settings, you can add your affiliate disclosure text and opt to link to your affiliate links disclaimer page.
Learn more: What is the disclosure text? How do I add one?
- Prevent auto-linking: We know what you're thinking – why would you ever want to prevent the auto-linking?! Sometimes, bloggers want to only utilize Tasty Links' keywords in a Featured Links block or when used in conjunction with Tasty Recipes' Equipment section. Basically, if you don't want your text automatically linked with your keywords but do want to have special image links, this is the perfect option for you!
Tasty Links and Images
So we were able to help you get your first keyword created and published. Excellent! But there's more to Tasty Links than just linking up text keywords. People are intrigued by visuals, so give them what they want with these options!
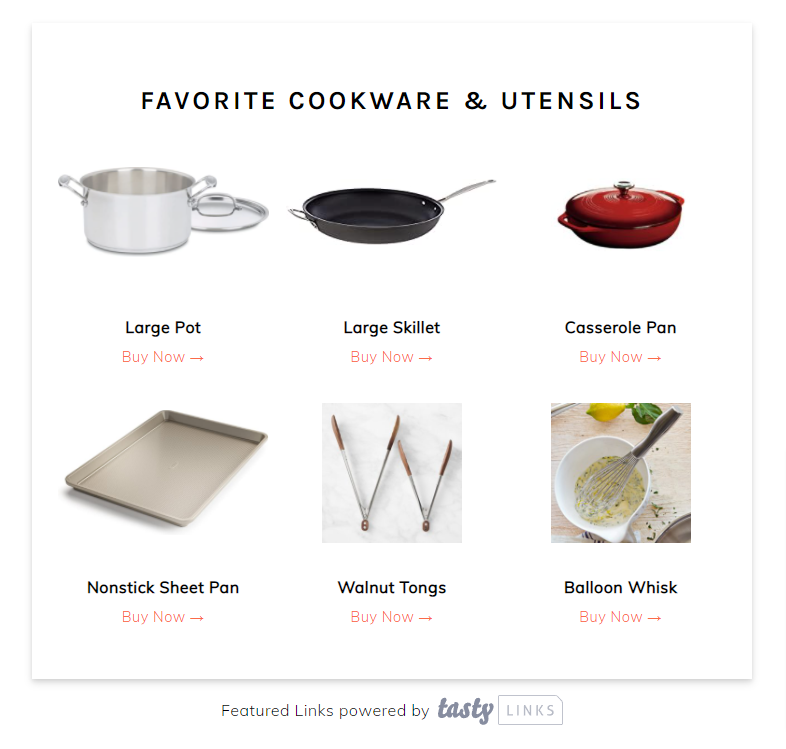
- Featured Link Blocks: See? We told you we'd talk about it! Remember when we told you that you can add images to your keywords? This is a great option when you're talking about several products you personally love using on a blog post and you want to provide your readers with the option of seeing exactly what you use.
Another option is creating a “Resources” page on your site. You can create multiple featured links blocks and organize them according to your needs.
Learn More: How do I add a Featured Links block?
- Amazon Affiliate Image Links: These are used inside of featured image blocks and the Tasty Recipes Equipment blocks. With Amazon's affiliate program, you're not allowed to upload your own images to your site so Tasty Links will pull that image in on your behalf!
Make sure you use the Add Amazon Link option when creating a link and the image should appear just fine!
Learn More: How to Automatically Add Images from an Amazon Associates Link
- Recipe Equipment Blocks: This is very similar to the Featured Image Block! Except these appear in your Tasty Recipes cards. This feature is only available when used in conjunction with Tasty Recipes 2.3.0 or newer.
Learn More: How do I add recipe equipment to my recipe cards?
Affiliate Disclosures
As previously mentioned, when creating your affiliate links, you'll want to turn on the disclosure option. Read more about setting up affiliate disclosures.
Max Replacements
If you might have the same keyword multiple times on a page, we recommend that you set a limit on the number of links that get added. After all, you don't want all your SEO link juice going to the same place.
To set a maximum threshold for each keyword, go to the WP Tasty → Tasty Links → Settings page. Add a number for Max Replacements Per Link (1-3 is usually plenty).
Each automatic link replacement will be counted, and stop replacing once the limit has been reached. Any manually added links won't be counted toward this limit.
Auto-linking Location(s)
In Tasty Links version 1.3 and later, you can easily specify where your links will be automatically inserted. By default, links will be added on all pages, posts and inside your Tasty Recipe cards. To prevent auto-linking in one of these areas, click one or more of the options.

ShareASale Affiliate ID
The ShareASale affiliate ID setting allows you to earn commission by recommending WP Tasty to your readers and followers. When a visitor to your site clicks on the affiliate link to WP Tasty and signs up, you receive a commission.
Note: Adding in your affiliate ID will populate the following call-to-action at the bottom of your Featured Links blocks:

Learn More: WP Tasty Affiliate Program, How to find your affiliate ID
So that’s a wrap on getting started with Tasty Links! If you have any other questions, please reach out to our support team for help.
Amazon Associates
As of 12/31/2023, Amazon no longer supports static image links from the Amazon Associates SiteStripe. Amazon now requires the use of the Amazon Product Advertising API (PA API) to retrieve Amazon images. Enter your Amazon PA API Keys to automatically update the featured images for your Tasty Links using Amazon associates URLs.