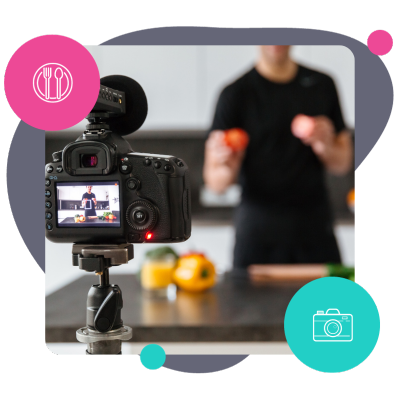
Are you a food blogger who's spending hours taking pictures of food, only to feel like your photos don't do your recipe justice?
Well, we’re here to turn that around! Our top food photography tips and fixes will take your food photography from meh to mouthwatering.
We'll guide you through the basics, tackle common hiccups, and answer those need-to-know FAQs.
Get ready to say goodbye to bland images and hello to photos that pop!
- Get a decent camera
- Make your food photo ready
- Work those angles
- Take advantage of natural lighting
- Factor in the color wheel
- Experiment with focal length and depth of field
- Follow the rules of thirds
- Use props effectively
- Shoot throughout the whole cooking process
- Mix in your own style
- Edit and serve up your photos
1. Get a decent camera
If you're shooting food photography, you need a camera!
Now, if you think you need to run out and spend a ton of money on a top-of-the-line camera, you're wrong. You're good to go if you have a device that can take photos. Maybe your smartphone or a basic point-and-shoot.
Whatever camera you're using, get to know it. Get a feel for the manual settings and how to work the basics outside of just turning it on and shooting in auto mode.
And if blurry photos from your camera shaking are a problem, tripods are your stable friend!
They're perfect for capturing sharp, clear images, especially in low light. And they don't break the bank. You can get a basic tripod on Amazon for under $30.
Curious about what not to do with your camera?
Don't neglect it. It needs care, too! So, take the time to clean your lenses. Properly, though, you don't want scratches. A scratch or a dirty lens really ruins great food shots!
2. Make your food photo ready
Good styling tricks do more than make your dishes look attractive. They tell a story, set a mood, and water your viewers' mouths.
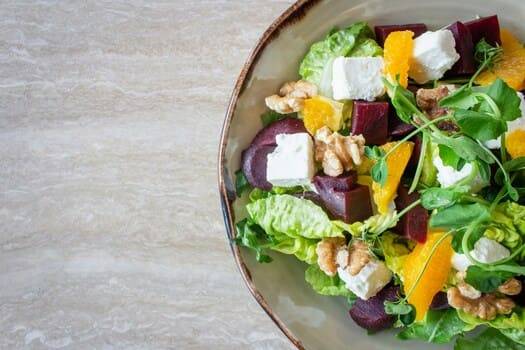
Follow our photography styling tips to get your food's good side!
- Always use fresh ingredients. They bring vibrance and life to your photos! Think of fresh ingredients as the secret ingredient that adds that ‘wow' factor to your shots.
- Highlight the main dish. Remember, your main dish is the superstar. Put it over a simple backdrop and avoid too many elements in the frame. This way, your dish gets all the attention it deserves, just like a lead actor on stage!
- Simplicity is key. When it comes to food photography, a less-is-more approach often works wonders. A cluttered space only overshadows your dish.
So, go for a balanced and uncluttered setup – your dish should always be the center of attention.
3. Work those angles
Just like us, every dish has its best side!
It's all about finding that perfect angle to show off the yummy details. Is it the gooey cheese on a pizza from above? Or the layers of a cake from the side? Don't be afraid to experiment and see what makes your dish look irresistible.
Now, you might still be asking…but why overhead shots and side angles?
When you take an overhead shot, it’s like you’re giving a bird’s eye view of the dish. This angle is perfect for flat dishes like pizzas or beautifully arranged plates. That way, you can show off a spread of ingredients or the dish’s symmetry.
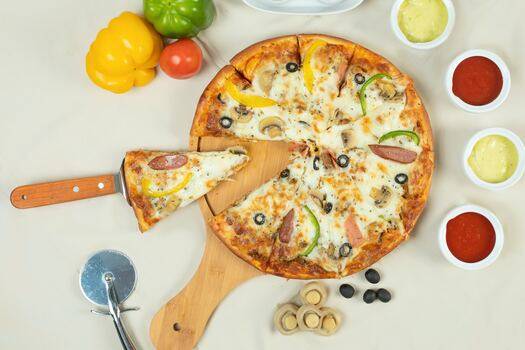
It’s great for telling a story of the meal as a whole. Including little details adds a nice touch, too! Look at how the cutter, veggies, and pizza condiments are perfectly placed in the photo above.
Side angles are a go-to for anything with layers or height – think burgers, cakes, or stacked sandwiches. Imagine focusing on one part of the dish, like the sauce oozing from the burger, and softly blurring the rest.
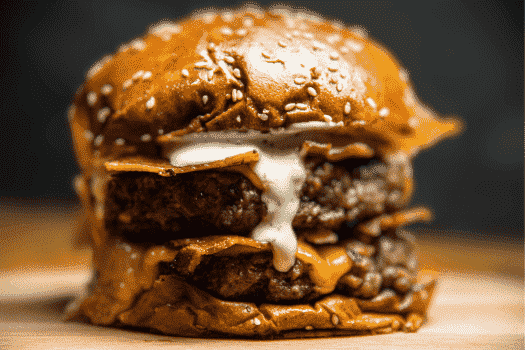
Table-height shots like these also add depth and a touch of drama. It gives a more intimate vibe. Making you feel like you're sitting right at the table about to dig in!
Let's cover one more angle before we move on: the three-fourths angle.
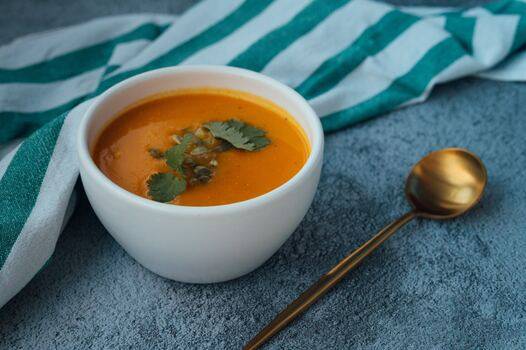
The three-fourths angle is like a flattering tilt. It gives a peek at what's inside without giving it all away. Angle your camera to catch the curve of a bowl of soup, highlighting the rich broth and the garnishes on top.
4. Take advantage of natural lighting
Natural light is a game-changer in food photography.
With natural light as your main light source, white balance works like a charm. It shows off the true colors of your food and adds a natural feel. The trick is to use it smartly. Look for a spot near a window with gentle light, or take your shots outside!
Here's a time of day tip: The golden hour, aka the time right after sunrise or before sunset, is a perfect time for food photography light. This soft, golden light creates a warm, inviting touch to your photos. It's ideal for capturing that cozy, appetizing look.
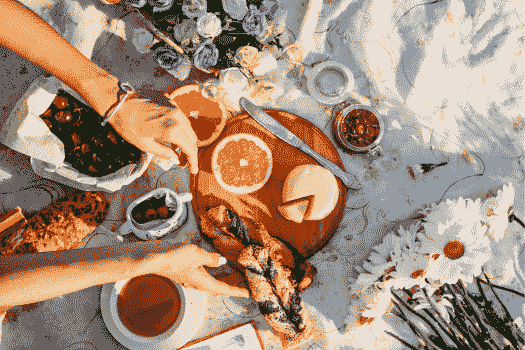
Avoid direct sunlight and artificial lighting. Both can mess with color balance, creating harsh shadows that make your dish look less than tasty.
Shadows can add depth to your photos. But, just like all ingredients – moderation is key.
Here's a trick for softening the shadows: Use a bounce light, a simple whiteboard or a reflector. That way, the lights spread evenly across your dish, highlighting its textures and details.
5. Factor in the color wheel
If you want your photos to look like they've been taken by a professional food photographer, nail color theory.
It might sound a bit complicated, but we promise it isn't. We'll break it down for you! Take a look at the color wheel below.
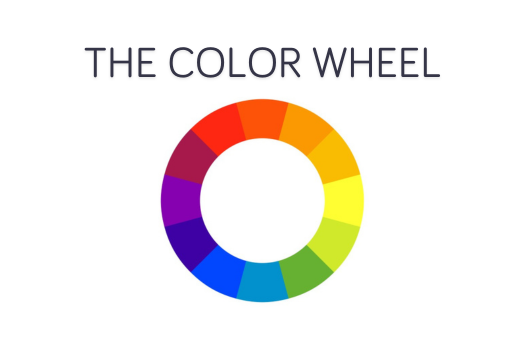
Now, imagine you're an artist with your dish as the canvas. Complementary or contrast colors are across from each other on the color wheel, and they're like color soulmates. They work perfectly together.
Have a green dish like green beans? Place it against a reddish background and watch those green tones pop! It's like they're doing a little dance of contrast in the dish.
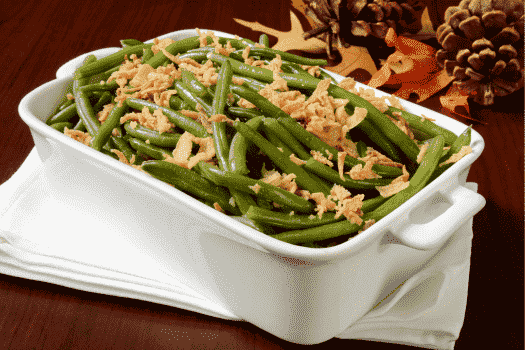
But sometimes, you might want a more soothing, unified look.
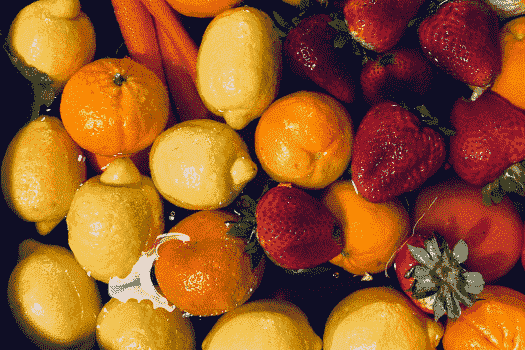
That’s where harmonious colors come in. These colors sit side by side on the color wheel, just like this photo of red, yellow, and orange fruits soaking in the sink side by side.
Don't forget the power of simplicity.
Neutral backdrops like white, black, or grey can be incredibly effective. They allow the natural colors of the food to stand out, making the dish the center of attention.
However, there are some color clashes you'll want to avoid.
Clashing colors are distracting, so choose a background that complements rather than competes. Be careful with overly saturated colors, too. They're overwhelming and unrealistic.
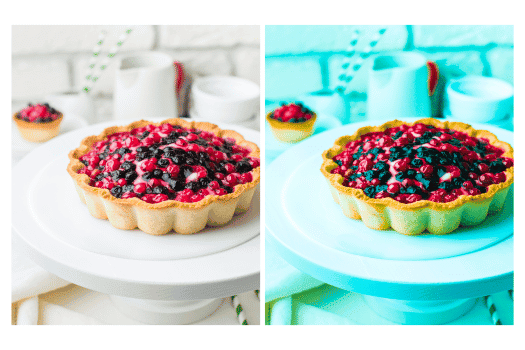
And remember, colors evoke emotions and appetites. Warm colors often stimulate hunger, while cooler colors might not be as enticing. So go for a warmer photo with natural colors, like the pie photo on the left instead of the one on the right.
By thoughtfully incorporating color theory into your food photography, you can create stunning images that make stomachs rumble.
6. Experiment with focal length and depth of field
Remember how we mentioned the importance of getting to know your camera, especially its manual settings? These settings are key in getting the right depth of field and focal length.
Here’s how to make the most of them:
- Depth of field: Use a shallow depth of field to blur everything but the main course or a deeper depth to capture the full spread of a feast in sharp detail.
- Focal length: A wide-angle lens is perfect for capturing the entire table setting, while a telephoto lens lets you zoom in on the yummy details of a gourmet dish.
- Aperture settings: A wider aperture (lower f-number) creates a soft, blurred background that makes a plated dish stand out, but a smaller aperture (higher f-number) puts every element of a complex dish in clear focus.
7. Follow the rules of thirds
Here's another piece of advice for taking food photos: Master the rule of thirds.
It's an easy technique for beginners that takes your skills to the professional food photography level. It draws more tension, energy, and interest to the subject instead of just centering it. And, the best part is, this 3×3 grid is built into most cameras! So you can use it while you're shooting.
So, how do you follow this rule?
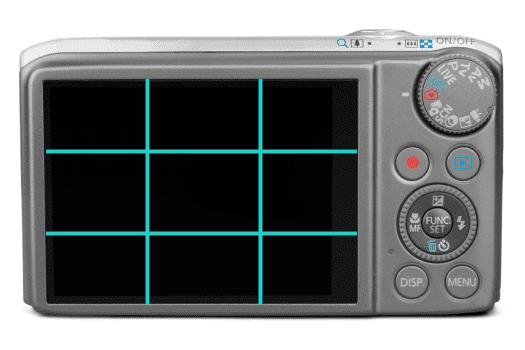
Look at the grid on your phone or camera. It's divided into nine equal parts, like a tic-tac-toe board. The rule of thirds says you should place the most important elements of your photo along these lines or at their intersections.
Got a gorgeous plate of pasta?
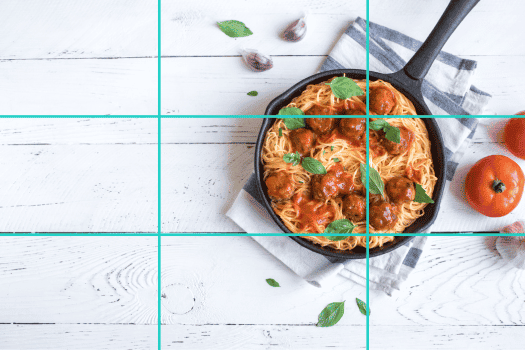
Try positioning it off-center and aligning it with one of the intersecting points on your grid. This gives your photo a natural balance and invites the viewer’s eyes to look at the whole image.
And remember, rules are meant to be broken.
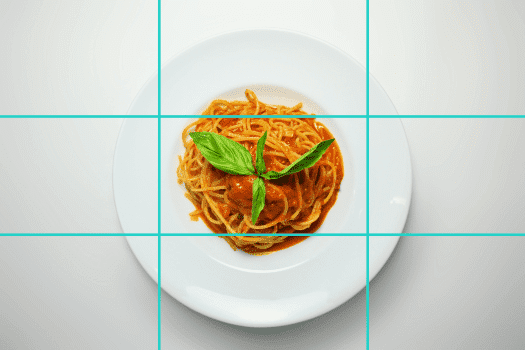
Sometimes, centering your dish creates a powerful, symmetrical photography composition.
8. Use props effectively
Props can add layers of context and depth to make your food look good in pictures.
Here’s how to choose and use props effectively:
- Choose the right props: Go with props that relate to your dish. If you're shooting a rustic loaf of bread, placing it on a cutting board can enhance its homemade, hearty feel.
- Be subtle: The props should complement your food, not compete with the main attraction. This could be as simple as a delicately placed napkin or fork.
- Stay consistent: Use props to set the mood or theme. Remember how we mentioned pairing the bread with the cutting board? That's perfect. Don't just mix and match things with no rhyme or reason.
Avoid the trap of overcrowding your scene, too. Too many props can make your photo look cluttered and distract from the dish.
9. Shoot throughout the whole cooking process
Photograph your food right from the beginning so you don't miss an opportunity to snap a perfect shot.
Let's say you're baking a cake. Start with the raw ingredients. Imagine the rich hues of the counter, the glossy eggs, and the fine sugar before they become a cake.
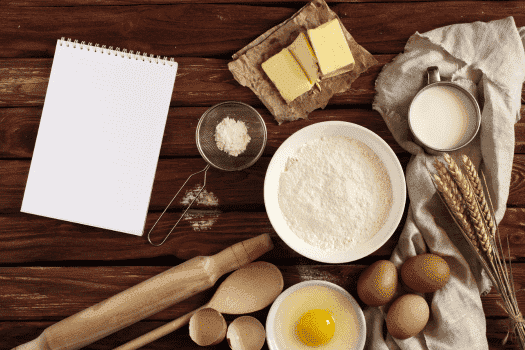
As you start baking, keep your camera at the ready.
Stirring the batter, pouring the cake into a mold, and carefully leveling the mix are all great steps to capture! Consider each photo a chapter in your cake’s story.
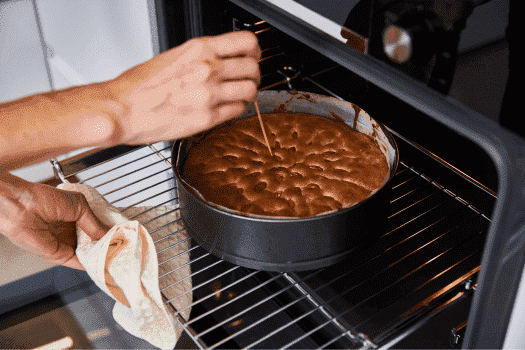
When it's in the oven, photograph your batter becoming a cake. The cake's rise in the oven, the golden browning of the crust, or the delicate process of applying icing. These changes add to the anticipation of the final product.
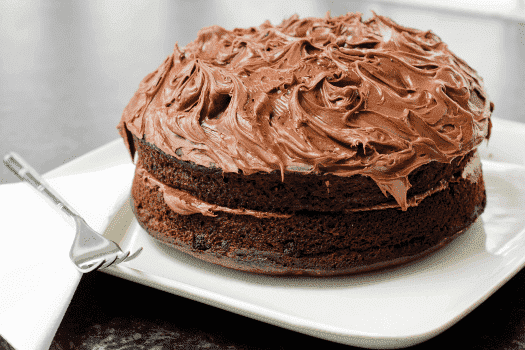
The climax of your story is the completed cake.
Now, capture the finished cake in all its yummy glory!
Don't forget about those behind-the-scenes shots too. Add shots of the baking environment. The mixing bowls, the oven, and the flour-dusted counter all add authenticity and context.
10. Mix in your own style
Your food photography, whether for a cozy home-cooked meal or sophisticated restaurant food styling, is a canvas for your unique style.
Embrace the rustic charm of homemade dishes or the sleek elegance of restaurant photography, and let your photos reflect your personal taste. Experimenting with different elements like rustic wooden tables or chic minimalist settings helps you discover and refine what fits you and your audience.
Personal touches create authentic and memorable images.
Love the outdoors? Maybe include natural elements like wood or fresh herbs in your shots. Adore vintage aesthetics? Antique utensils could add character to your photos.
Above all, trust in your creative instincts and let them guide your photography. Your unique perspective is what gives value to your work!
11. Edit and serve up your photos
After capturing your culinary creations, it's time for the magic touch of editing.
We recommend Adobe Lightroom for editing your food photos. If you're adjusting exposure, tweaking contrast, or experimenting with color tones, Lightroom acts as your digital darkroom. It turns good photos into great ones with just a few clicks!
Once your images are perfected, it's time to serve them up!
For food bloggers on WordPress, Tasty Pins and Tasty Recipes are dynamic plugins that bring ease and aesthetics together on your platform. Tasty Pins maximizes your image’s potential on Pinterest, making it completely pin-worthy!

Tasty Recipes formats your delectable creations into SEO-friendly, visually appealing posts. They work in tandem to make your dishes irresistible to the eye and drive traffic and engagement on your blog and beyond.
With your photos finely tuned and your food blog content optimized, you're all set to capture the hearts and taste buds of food lovers across the globe.
Follow up with your own food photography tips!
Remember the power of your creativity in turning simple meals into stunning visuals. Your journey in food photography is just beginning, and each photo you take is a step in the right direction.
And, if you're looking for more food blogging advice, check out our other articles:
- How to Write a Food Blog Post
- 15 Food Blogging Tips to Spice Up Your Life
- How to Create a Food Blog on WordPress
Don't forget to share your photos with us, and stay curious. Keep experimenting with new techniques, and always look for new stories to tell through your lens. Each dish offers a new opportunity to refine your skills and express your artistic vision.
Good luck behind the lens!
